
目次 閉じる
- Introduction: Why Audio Is Everything for VTubers
- Who This Guide Is For
- 1. Why Audio Quality Makes or Breaks Your Stream
- 2. Microphone Types, Sound Differences & Choosing Your Perfect Fit
- 3. Best Mics by Budget & Recommendations
- 4. Audio Interfaces: The Heart of Pro Streaming Sound
- 5. Cables, Accessories & Room Setup — The Invisible Sound Boosters
- 6. Room Acoustics & Streaming Studio Setup
- 7. Streaming Software & Audio Processing: Getting That “Radio-Ready” Sound
- 8. Real-World Troubleshooting & Power User Tips
- 9. Mastering & Loudness for Streaming
- 10. Advanced Setups: Multi-Mic, Dual-PC, and Loopback
- 11. Music, BGM & Copyright: Protecting Your Channel from DMCA Strikes
- 12. Real-World Before & After: What Upgrades Actually Sound Like
- 13. Conclusion: Your Audio, Your Brand — Level Up Today
Introduction: Why Audio Is Everything for VTubers
When it comes to VTuber streaming, your voice is everything. Your audience can’t see your face — they see an avatar. That means your voice carries your personality, your humor, your emotion, and your brand. It’s the single most important element of your content, and it’s the first thing viewers judge when they click into your stream.
Great audio builds trust instantly. When your voice sounds clear and professional, viewers assume the rest of your content is high quality too. On the other hand, muffled sound, background hiss, or constant clipping will drive people away within seconds — no matter how good your gameplay or conversation is. Investing in your audio setup is the highest-ROI upgrade you can make as a VTuber.
This guide walks you through everything you need to achieve professional-grade sound, from choosing the right microphone and audio interface to optimizing your streaming software and room acoustics. Whether you’re debuting on a tight budget or upgrading an established channel, you’ll find actionable advice here.
Who This Guide Is For
This guide is designed for English-speaking VTubers and streamers at every stage. If you’re a complete beginner looking for your first external microphone, you’ll find budget-friendly recommendations and step-by-step setup instructions. If you’re an intermediate creator who already has decent gear but wants to polish your sound, the sections on audio processing, room treatment, and gain staging will help you level up. And if you’re an advanced streamer considering dual-PC setups or multi-microphone configurations, the later sections cover those workflows in detail.
No matter where you are in your journey, the core principle is the same: your audio quality directly affects your viewer retention, your growth, and ultimately your income.
1. Why Audio Quality Makes or Breaks Your Stream
Viewer behavior research consistently shows that audiences are far more forgiving of lower video resolution than they are of poor audio. A stream at 720p with crystal-clear voice will retain viewers much longer than a 4K stream with buzzing, clipping, or echo. This is especially true for VTubers, where voice is the primary — and often the only — “real” element your audience experiences.
Clear audio does more than just sound pleasant. It makes your words easier to understand, which keeps viewers engaged in your commentary, jokes, and storytelling. It also plays a crucial role in avatar expression. Many VTuber tracking systems rely on audio input to drive mouth movement, and a clean signal produces more natural and responsive lip sync. A noisy or distorted input can cause your avatar’s mouth to jitter or stay open when it shouldn’t, breaking the immersion you’ve worked hard to create.
Beyond retention, audio quality directly impacts monetization. Viewers who feel comfortable in your stream are more likely to subscribe, donate, and stick around for longer sessions. Professional sound signals professionalism, and professionalism builds a loyal community. <!– SANGO: Warning Box –>
Bad Audio Affects Your Avatar Too Poor audio quality doesn’t just sound bad — it directly impacts your VTuber model’s lip sync. Many tracking systems use audio input to drive mouth movement. A noisy or distorted signal causes your avatar’s mouth to jitter, freeze, or stay open unnaturally, breaking the immersion for your viewers.
2. Microphone Types, Sound Differences & Choosing Your Perfect Fit
Choosing the right microphone is the single biggest decision in your audio setup. The two main categories — dynamic and condenser — have fundamentally different characteristics, and understanding them will save you from buying the wrong mic for your environment.
Dynamic Microphones
Dynamic microphones are built to handle loud environments and rough treatment. They use a moving coil attached to a diaphragm to convert sound into an electrical signal, which makes them naturally less sensitive to ambient noise. If you stream in a room with a loud PC, air conditioning, or housemates in the next room, a dynamic mic will reject much of that background noise and focus on your voice.
The trade-off is that dynamic mics capture less detail in the upper frequencies, which means they may sound slightly less “airy” or “sparkly” compared to condensers. For most VTuber streaming — gaming, chatting, collabs — this is actually a benefit, because it produces a warm, broadcast-style tone that’s easy to listen to for hours.
Popular Models: Shure SM58, Shure SM7B, Elgato Wave DX, Audio-Technica ATR1300x, Shure MV7X.
Condenser Microphones
Condenser microphones use a charged diaphragm and backplate to capture sound, making them significantly more sensitive than dynamics. This sensitivity picks up subtle vocal nuances, breath control, and tonal detail — which is why they’re the standard choice for singing, ASMR, voice acting, and narration-style content.
However, that same sensitivity means condensers will also pick up every keyboard click, fan hum, and room reflection around you. If your streaming space isn’t acoustically treated, a condenser mic can actually make your audio sound worse by amplifying all the noise you’re trying to avoid.
Popular Models: Audio-Technica AT2020, Audio-Technica AT4040, RODE NT1-A, Lewitt LCT 440 PURE, AKG C414 XLII, Elgato Wave:3.
USB vs. XLR Microphones
USB microphones include a built-in analog-to-digital converter (ADC), so you just plug them into your computer and start streaming. They’re the fastest path to better audio, and modern USB mics like the Elgato Wave:3 or the Blue Yeti deliver quality that would have been unthinkable at their price point just a few years ago.
XLR microphones require a separate audio interface to connect to your computer, which adds cost and complexity. But in return, you get significantly more control over your sound — better preamps, adjustable gain, real-time monitoring, and the ability to upgrade individual components over time without replacing everything. If you’re serious about streaming long-term, XLR is the path most creators eventually take.
USB Examples: Blue Yeti, Elgato Wave:3, RODE NT-USB Mini, FIFINE K669B.
XLR Examples: AT2020 XLR, Shure SM7B, Lewitt LCT 440 PURE, Shure MV7X.
Pickup Patterns (Polar Patterns)
The polar pattern of a microphone determines which directions it picks up sound from. For solo VTuber streaming, cardioid is almost always the right choice — it captures sound from directly in front of the mic and rejects sound from the sides and rear. This keeps your voice front and center while minimizing room noise.
Omnidirectional microphones capture sound from all directions equally, which can be useful for roundtable discussions or group collabs where multiple people share one mic. Supercardioid and hypercardioid patterns offer an even tighter pickup area than standard cardioid, providing extra background rejection in particularly noisy environments — but they require more precise positioning.
3. Best Mics by Budget & Recommendations
| Microphone | Price (USD) | Type | Connection | Polar Pattern | Best For |
|---|---|---|---|---|---|
| Entry Level | |||||
| FIFINE K669B | ~$30 | Condenser | USB | Cardioid | Budget debut, first upgrade |
| RODE NT-USB Mini | ~$80 | Condenser | USB | Cardioid | Compact setup, portability |
| Audio-Technica ATR1300x | ~$40 | Dynamic | XLR | Cardioid | Noisy rooms on a budget |
| Maono AU-PM421 | ~$60 | Condenser | USB | Cardioid | All-in-one starter kit (arm & filter included) |
| Mid-Range | |||||
| Elgato Wave:3 | ~$150 | Condenser | USB | Cardioid | Streamers wanting easy routing (Wave Link) |
| Blue Yeti | ~$100 | Condenser | USB | Multi-pattern | Versatility (solo, collabs, podcasts) |
| Shure SM58 | ~$100 | Dynamic | XLR | Cardioid | Indestructible all-rounder |
| Audio-Technica AT2020 | ~$100–$130 | Condenser | USB / XLR | Cardioid | Detail-oriented vocals, singing |
| Shure MV7X | ~$180 | Dynamic | XLR | Cardioid | Compact, great noise rejection |
| High-End | |||||
| Shure SM7B | ~$400 | Dynamic | XLR | Cardioid | Pro streaming standard, broadcast tone |
| Audio-Technica AT4040 | ~$350 | Condenser | XLR | Cardioid | Studio vocals, singing, voice acting |
| RODE NT1-A | ~$270 | Condenser | XLR | Cardioid | Ultra-low noise, ASMR, quiet content |
| AKG C414 XLII | ~$1,100 | Condenser | XLR | Multi-pattern | Top-tier studio use (Hololive talent choice) |
| Lewitt LCT 440 PURE | ~$270 | Condenser | XLR | Cardioid | Clarity at a competitive price |
| 2026 Trending | |||||
| Shure SM7dB | ~$500 | Dynamic | XLR | Cardioid | SM7B + built-in preamp (no Cloudlifter needed) |
| Elgato Wave DX | ~$100 | Dynamic | XLR | Cardioid | Streamer-optimized dynamic |
| HyperX ProCast | ~$250 | Condenser | XLR | Cardioid | Gaming/streaming-focused design |
Entry Level (Up to $75–$100)
If you’re just starting out, any of these microphones will be a massive upgrade over your headset or laptop mic. Don’t overthink it — pick one, learn to use it well, and upgrade later when you understand what you want.
- FIFINE K669B (USB) — The best value in the budget category. Surprisingly clean sound for under $30. A great first mic.
- Audio-Technica ATR1300x (Dynamic/XLR) — A solid dynamic option if you already have an interface or plan to get one.
- RODE NT-USB Mini (USB) — Compact, well-built, and sounds excellent for the price. RODE’s build quality is a step above most budget options.
- Maono AU-PM421 (USB) — Comes with a boom arm and pop filter included, making it a great all-in-one starter kit.
Mid-Range ($100–$250)
This is where most streamers find their sweet spot. The mics in this range deliver genuinely professional sound, and any of them will serve you well for years.
- Elgato Wave:3 (USB) — Purpose-built for streaming with excellent companion software (Wave Link) that simplifies audio routing. One of the best USB mics available.
- Blue Yeti (USB) — The industry standard for USB microphones. Multiple pickup patterns make it versatile, though it’s a condenser and picks up room noise easily.
- Shure SM58 (XLR) — Legendary durability and reliability. A staple of live performance for decades, and equally at home on a streaming desk.
- Audio-Technica AT2020 (USB/XLR) — Available in both USB and XLR versions, this is a go-to recommendation for creators who want condenser detail at a reasonable price.
- Shure MV7X (XLR) — A dynamic mic designed for content creators. Compact, great rejection of background noise, and built to last.
High-End ($250+)
These are the microphones you’ll hear on top-tier streams and professional broadcasts. They represent diminishing returns compared to mid-range options, but the difference is real and audible.
- Shure SM7B (XLR) — The gold standard for streaming and podcasting. Used by countless top creators. Requires a good preamp with plenty of gain (the 4th-gen Focusrite Scarlett series can drive it without a Cloudlifter).
- Audio-Technica AT4040 (XLR) — A large-diaphragm condenser with studio-grade detail. Ideal for VTubers who do singing or voice acting alongside gaming.
- RODE NT1-A (XLR) — One of the quietest condenser mics on the market (5 dBA self-noise). Perfect for quiet, detailed vocal work.
- AKG C414 XLII (XLR) — Used by major VTuber agencies including Hololive talent. Multiple polar patterns, exceptional clarity, and a premium price to match.
- Lewitt LCT 440 PURE (XLR) — Austrian engineering with remarkable clarity and a surprisingly competitive price for its performance tier.
Trending Models in 2026
- Shure SM7dB (XLR) — A game-changer variant of the SM7B with a built-in preamp, eliminating the need for a Cloudlifter or high-gain interface.
- Elgato Wave DX (XLR) — Dynamic mic optimized for streaming with excellent off-axis rejection.
- HyperX ProCast (XLR) — Built specifically for streamers, with a tight cardioid pattern and premium build quality.
- Focusrite Vocaster series — Designed as a complete content-creator ecosystem with matching interfaces.
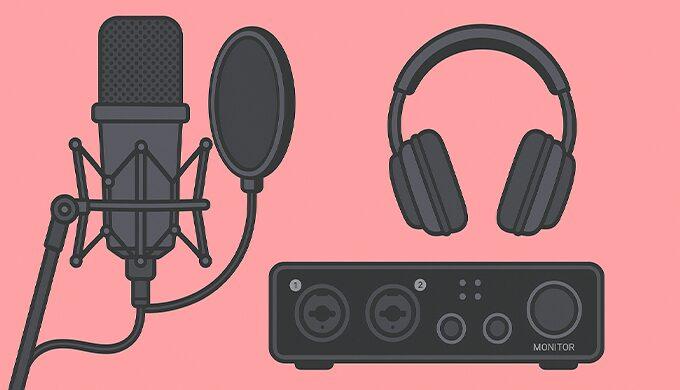
4. Audio Interfaces: The Heart of Pro Streaming Sound
Why You Need an Audio Interface
If you’re using an XLR microphone, an audio interface is essential — it’s the bridge between your mic and your computer. But even beyond basic connectivity, a good interface transforms your audio workflow. It gives you precise control over input gain, lets you monitor your voice in real-time with zero latency, and provides dramatically better analog-to-digital conversion than any USB mic’s built-in converter.
Think of it this way: a USB mic is like a point-and-shoot camera. It does everything in one package and produces decent results. An XLR mic with an audio interface is like a DSLR with interchangeable lenses — more complex, but capable of far better results, and you can upgrade individual pieces over time.
Top Picks for 2026
All of these interfaces are globally available, well-supported with stable drivers, and proven in streaming workflows.
- Focusrite Scarlett 2i2 (4th Gen) — ~$180: The best-selling audio interface in the world, and for good reason. The 4th-gen update brought 69 dB of preamp gain (enough to drive an SM7B without a Cloudlifter), an “Air” mode that adds a flattering high-frequency lift, and auto-gain for beginners. Comes with Ableton Live Lite and the Hitmaker Expansion bundle.
- MOTU M2 — ~$180: Rivals the Scarlett in every way and excels in conversion quality thanks to ESS Sabre32 DAC technology. The full-color LCD meters are a joy to use for real-time level monitoring. Built-in loopback makes it excellent for streaming.
- Yamaha AG03 Mk2 — ~$170: A hybrid interface and mixer designed specifically for streaming. Built-in effects (reverb, compression), a dedicated loopback channel, and intuitive physical controls make it incredibly streamer-friendly. A longtime favorite in the VTuber community.
- Steinberg UR22C — ~$160: Rock-solid reliability with Yamaha D-PRE preamps, MIDI I/O, and a bundled copy of Cubase AI. A dependable workhorse.
- Universal Audio Volt 276 — ~$250: Features a built-in analog compressor inspired by the classic 1176, adding warmth and polish to your voice before it even hits your computer. Excellent for creators who want that “radio-ready” sound with minimal software processing.
- Focusrite Vocaster Two — ~$200: Purpose-built for podcasters and streamers with auto-gain, high-gain preamps for dynamic mics, and simplified controls. If you want the easiest possible setup with professional results, this is worth a look.
Understanding Interface Specs
The two most important specs to understand are the AD/DA converters and the preamps. Converters determine how accurately the interface translates your analog voice signal into digital data — higher-quality converters (like the ESS Sabre chips in the MOTU M2) produce a more transparent, detailed sound. Preamps determine how much clean gain the interface can provide. Dynamic microphones like the SM7B need a lot of gain, so make sure your interface can deliver at least 60 dB without adding noise.
Pro Tip: Gain Staging
Proper gain staging is one of the simplest ways to dramatically improve your audio quality, and it costs nothing. Set your interface’s input gain so that your voice peaks between -12 dB and -6 dB in your streaming software. This gives you plenty of headroom to avoid clipping on loud moments (laughing, reacting, shouting during gameplay) while keeping your signal well above the noise floor.
In practice: speak at your normal streaming volume and adjust the gain knob until the meter in OBS or your interface sits comfortably in the green, occasionally touching yellow. If it ever hits red, turn it down. A clean, well-staged signal will always sound better than a hot, clipping one — even with the best mic in the world.
5. Cables, Accessories & Room Setup — The Invisible Sound Boosters
The gear between your mic and your interface matters more than most people realize. Cheap cables, unstable mounting, and poor power management can introduce noise and inconsistency that no amount of software processing can fix.
Boom Arms
A boom arm isolates your microphone from your desk, which eliminates vibrations from typing, mouse movements, and accidental bumps. It also lets you position the mic precisely where you need it and swing it out of the way when you’re not streaming.
Top Picks: Elgato Wave Mic Arm (low-profile design), RODE PSA1+ (heavy-duty, handles heavier mics), Blue Compass (smooth, studio-grade movement).
Pop Filters & Windscreens
Plosive sounds — hard “P,” “B,” and “T” sounds — create bursts of air that hit the mic diaphragm and produce an unpleasant thumping sound. A pop filter (the circular mesh screen) or a foam windscreen (that slips over the mic) catches these bursts before they reach the capsule. Either works; many streamers prefer foam windscreens for their clean look on camera.
Cables
For XLR connections, use shielded cables from reputable manufacturers. Mogami and Canare are the industry standards — their cables are built to last and provide excellent shielding against electromagnetic interference. For USB connections, shorter cables are better. Long USB runs can pick up interference from nearby power cables and electronics. Keep your USB cable under 6 feet (2 meters) if possible.
Power & Grounding
Ground loops are the most common cause of mysterious buzzing or humming in audio setups. Use grounded outlets for all your audio gear, and avoid plugging your interface into the same power strip as your PC or monitor. If you’re experiencing a persistent hum that you can’t eliminate by swapping cables, a ground loop isolator (around $10–$20) will usually fix it.
6. Room Acoustics & Streaming Studio Setup
Even the best microphone will sound mediocre in a bad room. Hard, flat surfaces — walls, desks, monitors, windows — reflect sound waves back into your mic, creating echo, flutter, and a hollow or “boxy” quality that’s immediately noticeable to listeners.
Sound Treatment
You don’t need to turn your room into a recording studio. A few strategic placements can make a significant difference. Start by placing acoustic foam panels or thick fabric (curtains, blankets, moving blankets) on the wall directly behind and above your microphone. This is the “first reflection point” — the surface most likely to bounce your voice back into the mic.
If your room has hard floors, adding a rug or carpet beneath your desk will absorb reflections from below. Even hanging a towel over the back of your monitor can help reduce reflections in a pinch. The goal isn’t to eliminate all reverb (that would sound unnaturally dead), but to tame the most distracting reflections.
Mic Placement
Position your microphone about 4–6 inches (10–15 cm) from your mouth, slightly off-axis (angled to the side rather than pointed straight at your lips). This reduces plosives and breath noise while still capturing a full, present sound. If your mic is too far away, you’ll need more gain, which raises the noise floor and picks up more room sound.
Avoid placing the mic directly against a wall. Leave at least 12 inches (30 cm) of space between the mic and any hard surface behind it to reduce comb filtering and reflection artifacts.
Managing Noise
Identify your biggest noise sources and position your mic away from them. PC fans, air conditioners, and mechanical keyboards are the usual culprits. With a cardioid mic, point the front of the mic (the pickup side) toward your mouth and the back (the rejection side) toward the noise source. This alone can reduce background noise by 10–20 dB.
7. Streaming Software & Audio Processing: Getting That “Radio-Ready” Sound
Once your hardware is dialed in, software processing is where you polish your sound from “good” to “broadcast quality.” Both OBS Studio and Streamlabs offer built-in audio filters that are surprisingly powerful when configured correctly.
OBS/Streamlabs Built-in Filters
Apply these filters in order on your microphone source for best results:
- Noise Gate: Sets a volume threshold below which audio is muted. This silences background noise when you’re not speaking. Set the close threshold just above your room’s ambient noise level, and the open threshold slightly above that.
- Noise Suppression (RNNoise): OBS includes the RNNoise AI-based noise suppression filter built in, and it’s remarkably effective at removing steady-state noise like fan hum or air conditioning. For mild background noise, this alone may be sufficient — and it’s completely free with no GPU requirements.
- Compressor: Reduces the dynamic range between your quietest and loudest moments. This makes your voice more consistent and easier to listen to over long sessions. Start with a ratio of 3:1 to 4:1, a threshold around -18 dB, and adjust from there.
- EQ: Fine-tune your tonal balance. A high-pass filter at 80–100 Hz removes low-end rumble (desk vibrations, HVAC). A gentle boost around 3–5 kHz adds presence and clarity. Cut around 200–400 Hz if your voice sounds “muddy” or “boxy.”
- Limiter: A safety net that prevents any audio from exceeding a set ceiling (typically -1 dB to -3 dB). This catches unexpected yells or laughs that would otherwise distort.
VST Plugins
For more granular control, you can load third-party VST plugins directly into OBS:
- ReaPlugs (Free): ReaEQ, ReaComp, ReaGate — a complete suite of professional-quality plugins from the makers of REAPER. The gold standard for free audio processing.
- TDR Nova (Free): A dynamic equalizer that combines EQ and compression per band. Excellent for taming specific frequency problems without affecting the rest of your sound.
- iZotope RX Elements (Paid): Professional-grade audio repair tools including de-noise, de-clip, and voice de-noise modules. Overkill for most streamers, but invaluable if you have persistent noise issues.
AI Noise Reduction in 2026
AI-powered noise reduction has matured significantly and is now a practical tool for everyday streaming:
- NVIDIA Broadcast (Free, requires RTX GPU): Installs as a virtual audio device and provides real-time noise removal, echo cancellation, and room echo reduction. Works with any streaming or communication app. Completely free for NVIDIA RTX graphics card owners — no subscription, no limitations. The noise removal is remarkably aggressive and handles keyboard noise, fan noise, and even nearby conversations well.
- Krisp ($8/month Pro plan, free tier available): Platform-agnostic noise cancellation that works on any hardware, including Mac. The free tier provides 60 minutes per day of noise cancellation. Unlike NVIDIA Broadcast, Krisp works on CPU, so it’s accessible to streamers without RTX GPUs. Note that mobile apps do not support real-time noise cancellation.
- OBS RNNoise (Free, built-in): Already included in OBS Studio at no cost. For mild to moderate background noise, this is often sufficient and requires zero additional setup.
Best Practice: Don’t stack multiple AI noise reduction tools — processing your audio through two noise reduction engines simultaneously can create artifacts and make your voice sound robotic or underwater. Pick one and combine it with manual EQ and compression for the best results.
Don’t Stack AI Noise Reduction Tools Running two noise reduction engines at the same time (e.g., NVIDIA Broadcast + Krisp) can create artifacts and make your voice sound robotic. Pick one tool and combine it with manual EQ and compression for the best results.
8. Real-World Troubleshooting & Power User Tips
Common Problems & Fixes
Buzz or Hum: This is almost always a grounding or cable issue. Start by swapping your XLR cable. If the hum persists, try plugging your audio interface into a different wall outlet (not just a different port on the same power strip). A ground loop isolator ($10–$20) will resolve most remaining cases. In rare situations, electromagnetic interference from nearby electronics (monitors, routers, phone chargers) can cause buzz — move them away from your mic and cables.
Popping and Clipping: If you hear harsh pops on plosive sounds, add a pop filter or adjust your mic angle so you’re speaking across the capsule rather than directly into it. If your audio is clipping (distorting on loud sounds), lower your input gain on the interface. Check your OBS audio meter — if it’s hitting 0 dB, you need more headroom.
Muffled or Muddy Voice: Apply a high-pass filter (80–100 Hz) to remove low-frequency rumble, and add a gentle presence boost around 3–5 kHz. If you’re using a dynamic mic, make sure you’re close enough (4–6 inches) — dynamic mics lose clarity rapidly with distance. Also check that your mic isn’t picking up sound from the back or sides due to incorrect positioning.
Robotic or Stuttering Audio: This usually indicates a sample rate mismatch or a buffer size issue. Make sure your audio interface, Windows sound settings, and OBS are all set to the same sample rate (48 kHz is standard for streaming). If your audio stutters, try increasing your buffer size in your interface’s control panel.
Echo or Room Sound: If your voice sounds like you’re in a bathroom, your mic is picking up too many room reflections. Treat the wall behind your mic with acoustic panels or thick fabric, move closer to the mic, and consider switching to a dynamic mic with tighter pickup rejection.
Signal Flow Basics
Understanding your signal chain helps you troubleshoot faster. For a standard streaming setup, the flow is:
Mic → XLR Cable → Audio Interface → USB Cable → PC → OBS/Streamlabs → Stream
Every link in this chain can introduce problems. When troubleshooting, test each connection point systematically: swap cables, try a different USB port, test with a different app. Isolating the problem to a specific link saves hours of frustration.
9. Mastering & Loudness for Streaming
Loudness standards exist so that your stream doesn’t blow out your viewers’ ears or force them to crank their volume to hear you. Different platforms have different targets, and hitting the right range ensures your audio sits comfortably alongside other streams your viewers watch.
Platform Loudness Targets
- Twitch: Target -14 to -16 LUFS (Loudness Units relative to Full Scale). Most Twitch streamers aim for -14 LUFS for voice.
- YouTube: Target -14 LUFS. YouTube automatically normalizes uploaded videos to this level, so if your stream VODs are significantly louder or quieter, they’ll sound off when replayed.
- General Best Practice: Keep your voice around -14 LUFS and your game/music audio 6–10 dB below that. This ensures your voice always cuts through clearly without being drowned out by gameplay sounds.
How to Measure Loudness
You can monitor your loudness in real-time using free tools. The Youlean Loudness Meter is a free VST plugin that you can load into OBS to display your LUFS level during streaming. Alternatively, the built-in OBS audio meters give you a rough sense — aim for your voice to sit between -20 dB and -10 dB on the meter, with peaks no higher than -6 dB.
Using a Limiter
A limiter is your safety net. Set it as the last plugin in your audio chain with a ceiling of -1 dB to -3 dB. This catches unexpected loud moments (jumpscare reactions, excited shouting) and prevents them from distorting or blasting your viewers’ speakers. Every professional stream uses a limiter — it’s non-negotiable.
Test on Multiple Devices
Before going live, listen to your audio on headphones, laptop speakers, and a phone. Your stream sounds very different on each, and mobile viewers are a growing portion of every audience. If your voice is clear and balanced on all three, you’re in good shape.
10. Advanced Setups: Multi-Mic, Dual-PC, and Loopback
As your channel grows, you may need more complex audio routing. These setups require more planning but unlock capabilities that simple configurations can’t match.
Multi-Microphone Setups
If you’re doing in-person collabs, interviews, or roundtable streams, you’ll need multiple microphones routed through a mixer or a multi-input audio interface. The MOTU M4 (4 inputs) or the Focusrite Scarlett 4i4 are excellent choices for two-mic setups. For larger groups, consider a dedicated hardware mixer like the Yamaha MG10XU, which gives you hands-on control of individual levels, EQ, and effects for each mic.
Dual-PC Streaming
A dual-PC setup uses one computer for gaming and a second for encoding and streaming. This offloads the CPU-intensive encoding process and produces smoother streams. Audio routing between the two PCs can be done via a physical line-out/line-in connection using 3.5mm or XLR cables, or through an audio interface with loopback functionality.
Audio Routing Software
For complex routing needs on a single PC, software mixers give you virtual audio channels that you can assign independently:
- VoiceMeeter Banana (Free, Windows): A virtual audio mixer that creates multiple virtual inputs and outputs. You can route your mic, game audio, music, and Discord to separate channels, controlling the volume and processing of each independently. This is particularly useful for separating VOD audio — you can exclude copyrighted music from your recordings while still playing it live.
- Elgato Wave Link (Free with Wave mics): A polished, beginner-friendly alternative that provides similar routing capabilities if you’re in the Elgato ecosystem.
- MOTU/Yamaha Built-in Loopback: Both the MOTU M2/M4 and Yamaha AG series include loopback functionality in their driver software, allowing you to mix system audio and mic input for seamless streaming without additional software.
11. Music, BGM & Copyright: Protecting Your Channel from DMCA Strikes
Music can define the atmosphere of your stream, but using the wrong tracks can get your VODs muted, your clips taken down, or your entire channel suspended. DMCA enforcement on Twitch and YouTube is automated and aggressive — “I didn’t know” is not a defense, and even a few seconds of a recognizable copyrighted song can trigger a claim.
Understanding DMCA for Streamers
The Digital Millennium Copyright Act (DMCA) requires platforms like Twitch and YouTube to act when rights holders report unauthorized use of their music. On Twitch, consequences escalate: your first offense may result in a warning and VOD mute, but repeated violations can lead to temporary or permanent channel bans. YouTube uses its Content ID system to automatically detect copyrighted music and may mute, demonetize, or remove your content.
Safe Music Sources for Streaming
These services are specifically designed for streamers and provide properly licensed music:
- StreamBeats (Free): Created by YouTuber Harris Heller, this library offers over 1,500 tracks across genres like lo-fi, chill hop, rock, and EDM. No attribution required, no signup, no cost. All tracks are registered with Twitch’s Audible Magic and YouTube’s Content ID systems.
- Epidemic Sound (~$10–$18/month): Over 40,000 tracks with excellent search and filtering. All tracks are composed exclusively for the platform, minimizing false Content ID matches. One of the highest-quality libraries available.
- Pretzel Rocks (Free tier + paid plans): Veteran in the DMCA-free music space with Twitch integration, including “Now Playing” chat commands and Stream Deck control.
- Monstercat Gold (~$7.50/month): Primarily EDM genres. Covers up to 6 livestreaming channels per subscription. Note that without a subscription, tracks can still be used but revenue from your content may be claimed by Monstercat.
- NCS (NoCopyrightSounds, Free): Free-to-use electronic music. Attribution is required in your video description.
Best Practice: Separate Your Audio Tracks
The most important technical step you can take is configuring OBS to record music on a separate audio track from your voice and game audio. This way, even if you play licensed music live, you can strip it from your VODs and clips. In OBS, go to Settings → Output → Recording and enable multiple audio tracks. Assign your music source to a track that isn’t included in your stream recording.
12. Real-World Before & After: What Upgrades Actually Sound Like
Reading specs and recommendations is useful, but nothing drives the point home like real-world examples of what specific upgrades actually accomplish. Here are common upgrade paths and what you can expect from each.
Headset Mic → USB Condenser (e.g., Elgato Wave:3)
This is the most dramatic single upgrade most streamers will ever make. A headset mic typically captures a thin, nasal tone with significant background noise. Switching to a dedicated USB condenser immediately produces a fuller, warmer voice with far less ambient pickup. Most viewers will notice the difference within seconds.
USB Mic → XLR + Audio Interface (e.g., SM7B + Focusrite Scarlett 2i2)
The improvement here is more subtle but meaningful. You’ll notice a lower noise floor, more control over your tone, and the ability to fine-tune your sound with hardware gain staging rather than relying entirely on software. The real benefit is long-term flexibility — you can swap mics, add effects, and expand your setup without replacing everything.
No Room Treatment → Basic Acoustic Panels
Adding even two or three foam panels behind your mic eliminates the hollow, echoey quality that makes amateur streams immediately recognizable. Your voice will sound tighter, more focused, and more “intimate” — like you’re speaking directly to each viewer rather than across a room.
No Noise Reduction → NVIDIA Broadcast or OBS RNNoise
Enabling AI noise reduction removes the constant hiss of PC fans, the hum of air conditioning, and the clatter of mechanical keyboards. The effect is striking — your audio goes from “streamer in a bedroom” to “broadcaster in a studio” with a single toggle.
Before Software Processing → Configured OBS Filter Chain
Adding a noise gate, compressor, EQ, and limiter to your OBS audio chain transforms inconsistent, peaky audio into smooth, professional sound. Your quiet moments become audible without cranking the volume, and your loud reactions don’t blow out speakers. This is a free upgrade that every streamer should implement.
13. Conclusion: Your Audio, Your Brand — Level Up Today
Your voice is your brand. As a VTuber, it’s the most real, most human element of your content — and it’s the thing your audience connects with most deeply. Investing in your audio isn’t just a technical upgrade; it’s an investment in viewer trust, retention, and long-term growth.
The good news is that you don’t need to spend thousands of dollars to sound great. A $30 USB mic with proper positioning and OBS filters will outperform a $300 mic in a bad room with no processing. Start where you are, apply the fundamentals from this guide, and improve one piece at a time.
Here’s your action plan:
- Today: Configure your OBS audio filters (noise gate, compressor, EQ, limiter). This is free and takes 15 minutes.
- This week: Evaluate your room — add a blanket, rug, or foam panel behind your mic. Move noise sources away.
- When budget allows: Upgrade to a dedicated microphone (USB if starting out, XLR if you want long-term flexibility).
- Ongoing: Test your audio on headphones and phone speakers before every stream. Ask a trusted friend or viewer for honest feedback.
Your best streams start with great sound. Make today the day you level up.
🎮 Ready to start your VTuber journey? Back to the VTuber Guide Hub ↓